
|
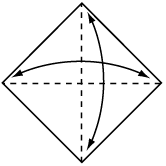
1. Start with a square piece of paper, white side up. Fold the paper in half, crease well and open, and then fold again in the other direction.
|
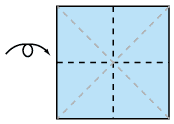
2. Turn the paper over to the coloured side. Fold the paper in half, crease well and open, and then fold again in the other direction. Your creases should look like this.
|
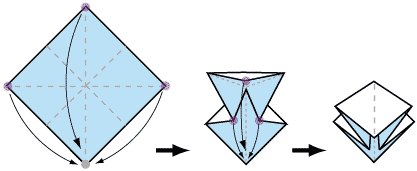
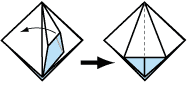
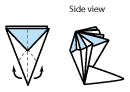
3. Using the creases you have made, Bring the top 3 corners of the model down to the bottom corner. Flatten model.
|
4. Fold toward centre line and unfold.
|
5. Using the crease you have just made, open and flatten this flap.
|
6. Repeat step 4 and 5 on the other 3 flaps of the model.
|

|
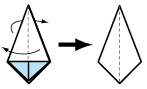
7. 'Turn the page' of the front and back flaps; so your model looks like this.
|
8. Lift the top layer up, folding along the crease shown.
|
9. Now repeat step 8 on the remaining 3 flaps, so the model now looks like this.
|

|
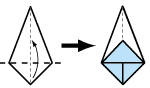
10. Turn over and make sure there are equal pleats behind each side of model.
|
11. Pinch these two creases through all layers.
|
12. Now pinch the narrow end to make the edges meet behind the model.
|
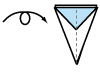

13. Holding the narrow point of the model very loosely, pull the outermost petals toward each other until they meet.
|
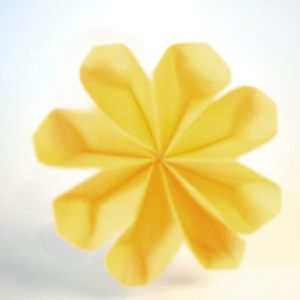
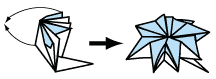
14. Now form the petals by pinching the ends, and slightly folding back these tips. Finished Flower.
|

0 Comment "Origami Flower Instructions"
Post a Comment