
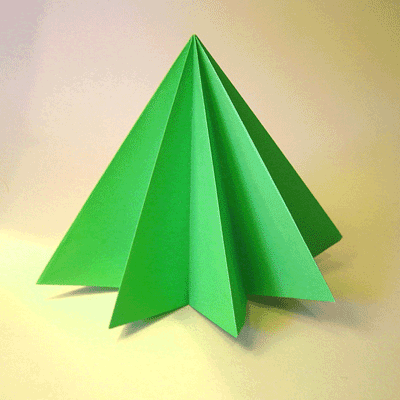
The origami pine tree is a lovely model. Make it with green paper, textured if you have it and it will look so sweet.
These pine trees are great to make with kids, and pair with the little house design.
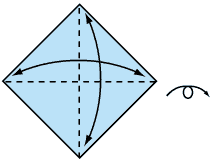
1. Start with a square piece of paper, coloured side up.
Fold in half in 2 directions.
|
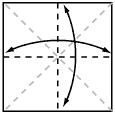
2. Turn the paper over to the white side.
Fold the paper in half, crease well and open, and then fold again in the other direction
|
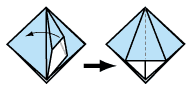
3. Using the creases you have made, Bring the top 3 corners of the model down to the bottom corner. Flatten model
|
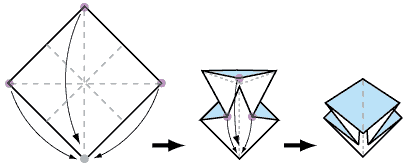
4. Fold toward centre line and unfold.
|
5. Using the crease you have just made, open and flatten this flap.
|
6. Repeat step 4 and 5 on the other 3 sides, so your model looks like this.
| ||
7. Now make sure there are equal flaps underneath the model, and that the top flap is showing full color, like this.
|
8. Fold whole model along this crease and unfold
|
9. Fold each full colour flap backwards underneath itself.
|


10. Now you can adjust your pine tree so it is even all the way around, and it stands up by itself.
And it's finished!
|

0 Comment "Origami Pine Tree Instructions"
Post a Comment