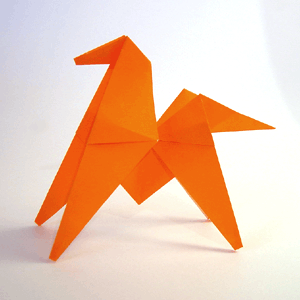
The fantastic origami horse is a favourite amongst anyone who has made it! It's a simple model to make, and once you have finished... just a sharp tap on the tail and the horse will flip for you!
Diagram Instructions
|
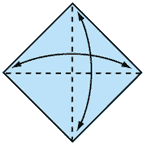
1. Start with a square piece of paper, coloured side up. Fold the paper in half, crease well and open, and then fold again in the other direction.
|
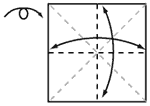
2. Turn the paper over to the white side. Fold the paper in half, crease well and open, and then fold again in the other direction. Your creases should look like this.
|
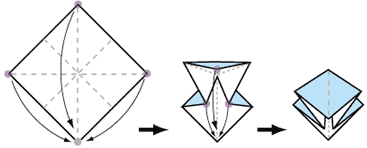
3. Using the creases you have made, bring the top 3 corners of the model down to the bottom corner. Flatten model.
|
4. Fold upper layer's outside corners toward centre line, then fold the top downward along the crease shown. Unfold.
|
5. Cut only top layer up to the top crease.
|
6. Fold the "legs" upwards along the creases shown.
|
|
7. Fold these sections in half, toward the centre.
|
8. Turn model over and repeat steps 4-7 on other side. The model should now look like this.
|
9. Rotate model and make creases as shown. Unfold.
|
|
10. Inside Reverse Fold the head and the tail. Finished Horse!
|
Optional Step: Blunt the 4 feet of the horse by folding the tips upward on the inside of the model.
|
To make the horse do a somersault, sharply tap upwards under his tail.
|


0 Comment "Origami Horse Instructions"
Post a Comment